-1.jpg?width=1200&height=525&name=DAKE003_%20Logos_Red%20(002)-1.jpg "dake corp")
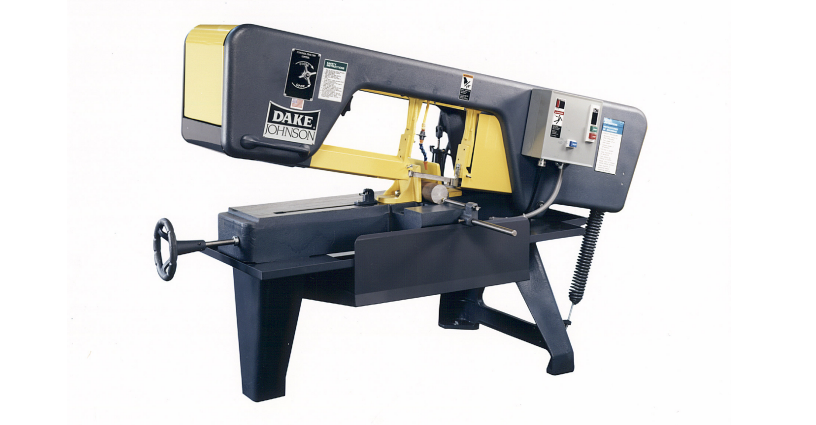
Dependable, trouble-free, heavy-duty - this is how people describe the Dake Johnson J Saw.
Since our double-frame construction has been an industry since 1941, we have continuously developed, tinkered with and ultimately perfected the bandsaw.
When it comes to our innovative, horizontal bandsaws we offer four models:
For the purposes of this article, we will be delving deeper into the world of the heavy duty, Johnson J Saw.
What are the Benefits of the Dake Johnson J Saw?
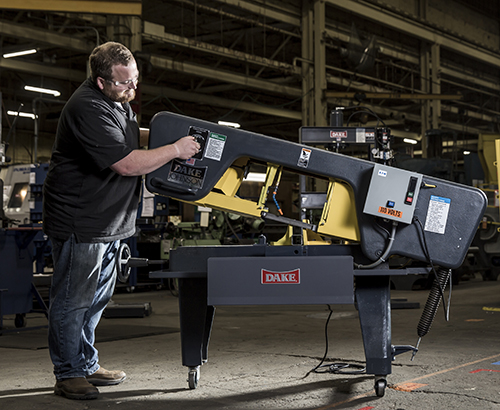
This heavy duty, American made, horizontal model of bandsaw is equipped with a dual cast head frame for large capacity cutting.
It also features a three-point suspension, adjustable eccentric roller blade guides, centralized controls, four-speed drive, 45-degree swivel vise jaws, and heavy 16-inch blade wheels.
Features include:
- One standard bi-metal blade.
- Hydraulic controlled, gravity head feed, for hands free cutting. Hydraulically variable head feed control regulation of head feeding rate. The machine automatically shuts off after the cut is complete.
- Cast two-piece head frame and large pivot bar, for extreme rigidity and long life.
- Gear box is driven via “V” belt and step pulleys for fast speed changes.
- Low voltage switches. Thermo overload protection, magnetic starter switch low voltage protection.
- The vise has a quick release for quick change over material sizes.
- Vertically mounted guide arms for more rigidity and straightest cuts. Guides are rollers that are fully adjustable and replaceable.
- Cast legs are of a three-point design. This unique design lets the machine sit flat, even on uneven floor surfaces.
What Customers Say About the Dake Johnson J Saw?
“It's hard to beat a Dake or an Ellis. My Kysor-Johnson (now Dake-Johnson) Model R was built in 1976. Probably cut a million parts before landing in my shop three years ago. Paid about $700, which seemed like a lot of money for something that old.
Boy, was I wrong - that little 7x10 saw will cut all day long, and many days it does just that. On one contract job, the length stop is set, four bars of flat stock are clamped up (total cut is 3" wide, 3" deep) and the saw started. This gives me barely enough time to deburr the four parts that were just cut. As the deburring is finished, the saw cuts off and I pick up four more parts, reset the stock, etc., etc.
Although capacity is listed at 10", the vise will open up (and the guides will move far enough) to cut almost 12". The largest part cut so far was 2" thick HRS nearly 12" long, set in the vise at an angle (with blocking so everything was firmly gripped). Even with almost 12" of blade buried in the cut, the saw never complained.
An even better choice is the Dake (or Johnson / Kysor-Johnson / Dake-Johnson) Model J. This is a much larger, heavier, more robust saw. They can often be found used for around $1,000, depending on condition.
Dake still provides parts and services for both the R Model and the J Model, even though some of these saws are 60 to 70 years old -- it's almost impossible to wear one out,” writes Barry Milton in a Hobart Welding Products’ forum.
According to customers, there is nothing that comes close to the quality of the Dake Johnson J Saw.
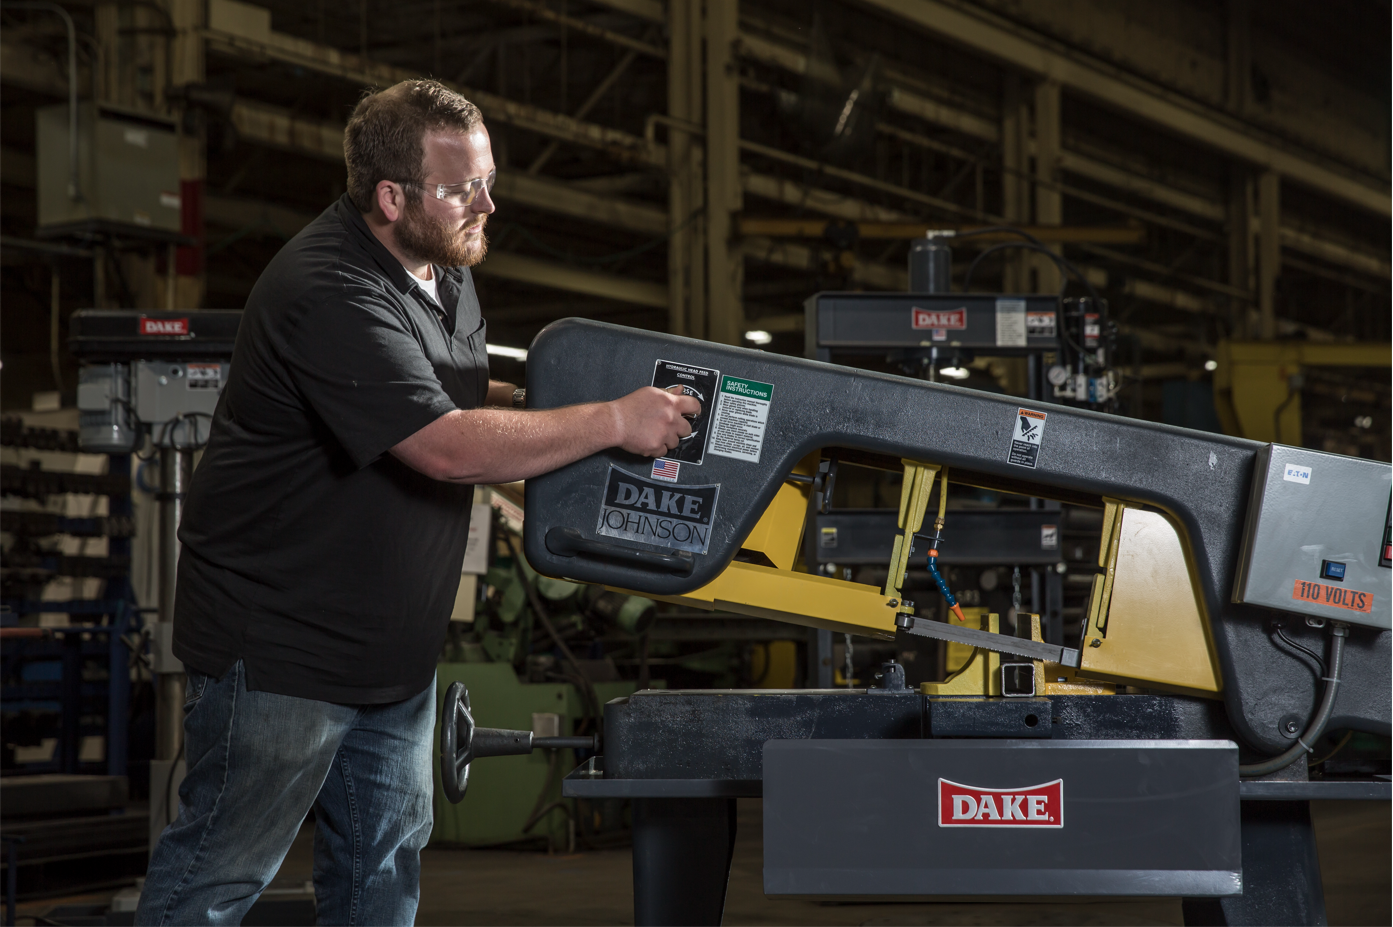
With that said, there is one question customers are always asking, “How exactly do we change the bandsaw blade?”
Changing the Bandsaw Blade on the Dake Johnson J Saw
Ensuring you have the correct blade and keeping it sharp will help guarantee the best cutting results.
To help you understand how to safely change the Bandsaw blade, we wanted to make sure you have everything you need. In addition to our video explaining a step-by-step process, we also wanted to give you textual instructions.
Using the guidance detailed below, changing your blade will be a seamless process. The first step is removing the old bandsaw blade on the machine.
How to remove the old bandsaw blade:
- First, you need to raise the head half way up and remove the thumb screws.
- Then, you need to open the left and right top covers.
- Once the covers are open, loosen the thumb screws and remove the half moon drop pan.
- Then, you have to loosen the bolts and remove both the idle wheel and drive wheel covers.
- Once those covers are off, you need to remove the thumb screws in order to then remove both the right and left blade guards.
- You then need to carefully remove both chip brush pads.
- Then, you can loosen the blade tension.
- With heavy gloves, pull the blade from the rear guard.
- You then need to push the blade down off of the idle wheel and remove it from the blade guides.
- Then, grasp the blade by the read blade guide and flip it off of the drive wheel.
- After, hold the blade together in the middle and remove it from the left side of the machine.
Now that the old blade is off, you need to understand how exactly to put the new one on safely.
How to install the new bandsaw blade:
- First, you need to uncoil the new blade and grasp it together in the middle.
- Then, place the blade under the head and loop it around the drive wheel and rear blade guard.
- You then need to feed the blade into the guides.
- During this step, it’s important to make sure the blade is seated below the lip in the drive wheel and idle wheel.
- Then, you need to hold the blade tight and tighten the blade tension screw.
- You can then readjust guides if necessary. Important note: You need to have a drag on the blade while also maintaining the ability to turn the bearing by hand.
- Then, you need to replace the chip brush pads.
- Next, replace all the removed guarding. Important note: NEVER operate the saw without all guards in place.
- Finally, after putting all the guarding back in place, check blade tracking and make any needed adjustments.
When operating metalworking tools, it’s important to remember the dangers involved. The Occupational Safety and Health Administration (OSHA) on the Machine Accident’s website outlines a list of do’s and don’ts to reduce the risk of metalworking accidents.
If you want to learn more about our complete product line here at Dake, click here to find a distributor or visit our product page.