-1.jpg?width=1200&height=525&name=DAKE003_%20Logos_Red%20(002)-1.jpg "dake corp")
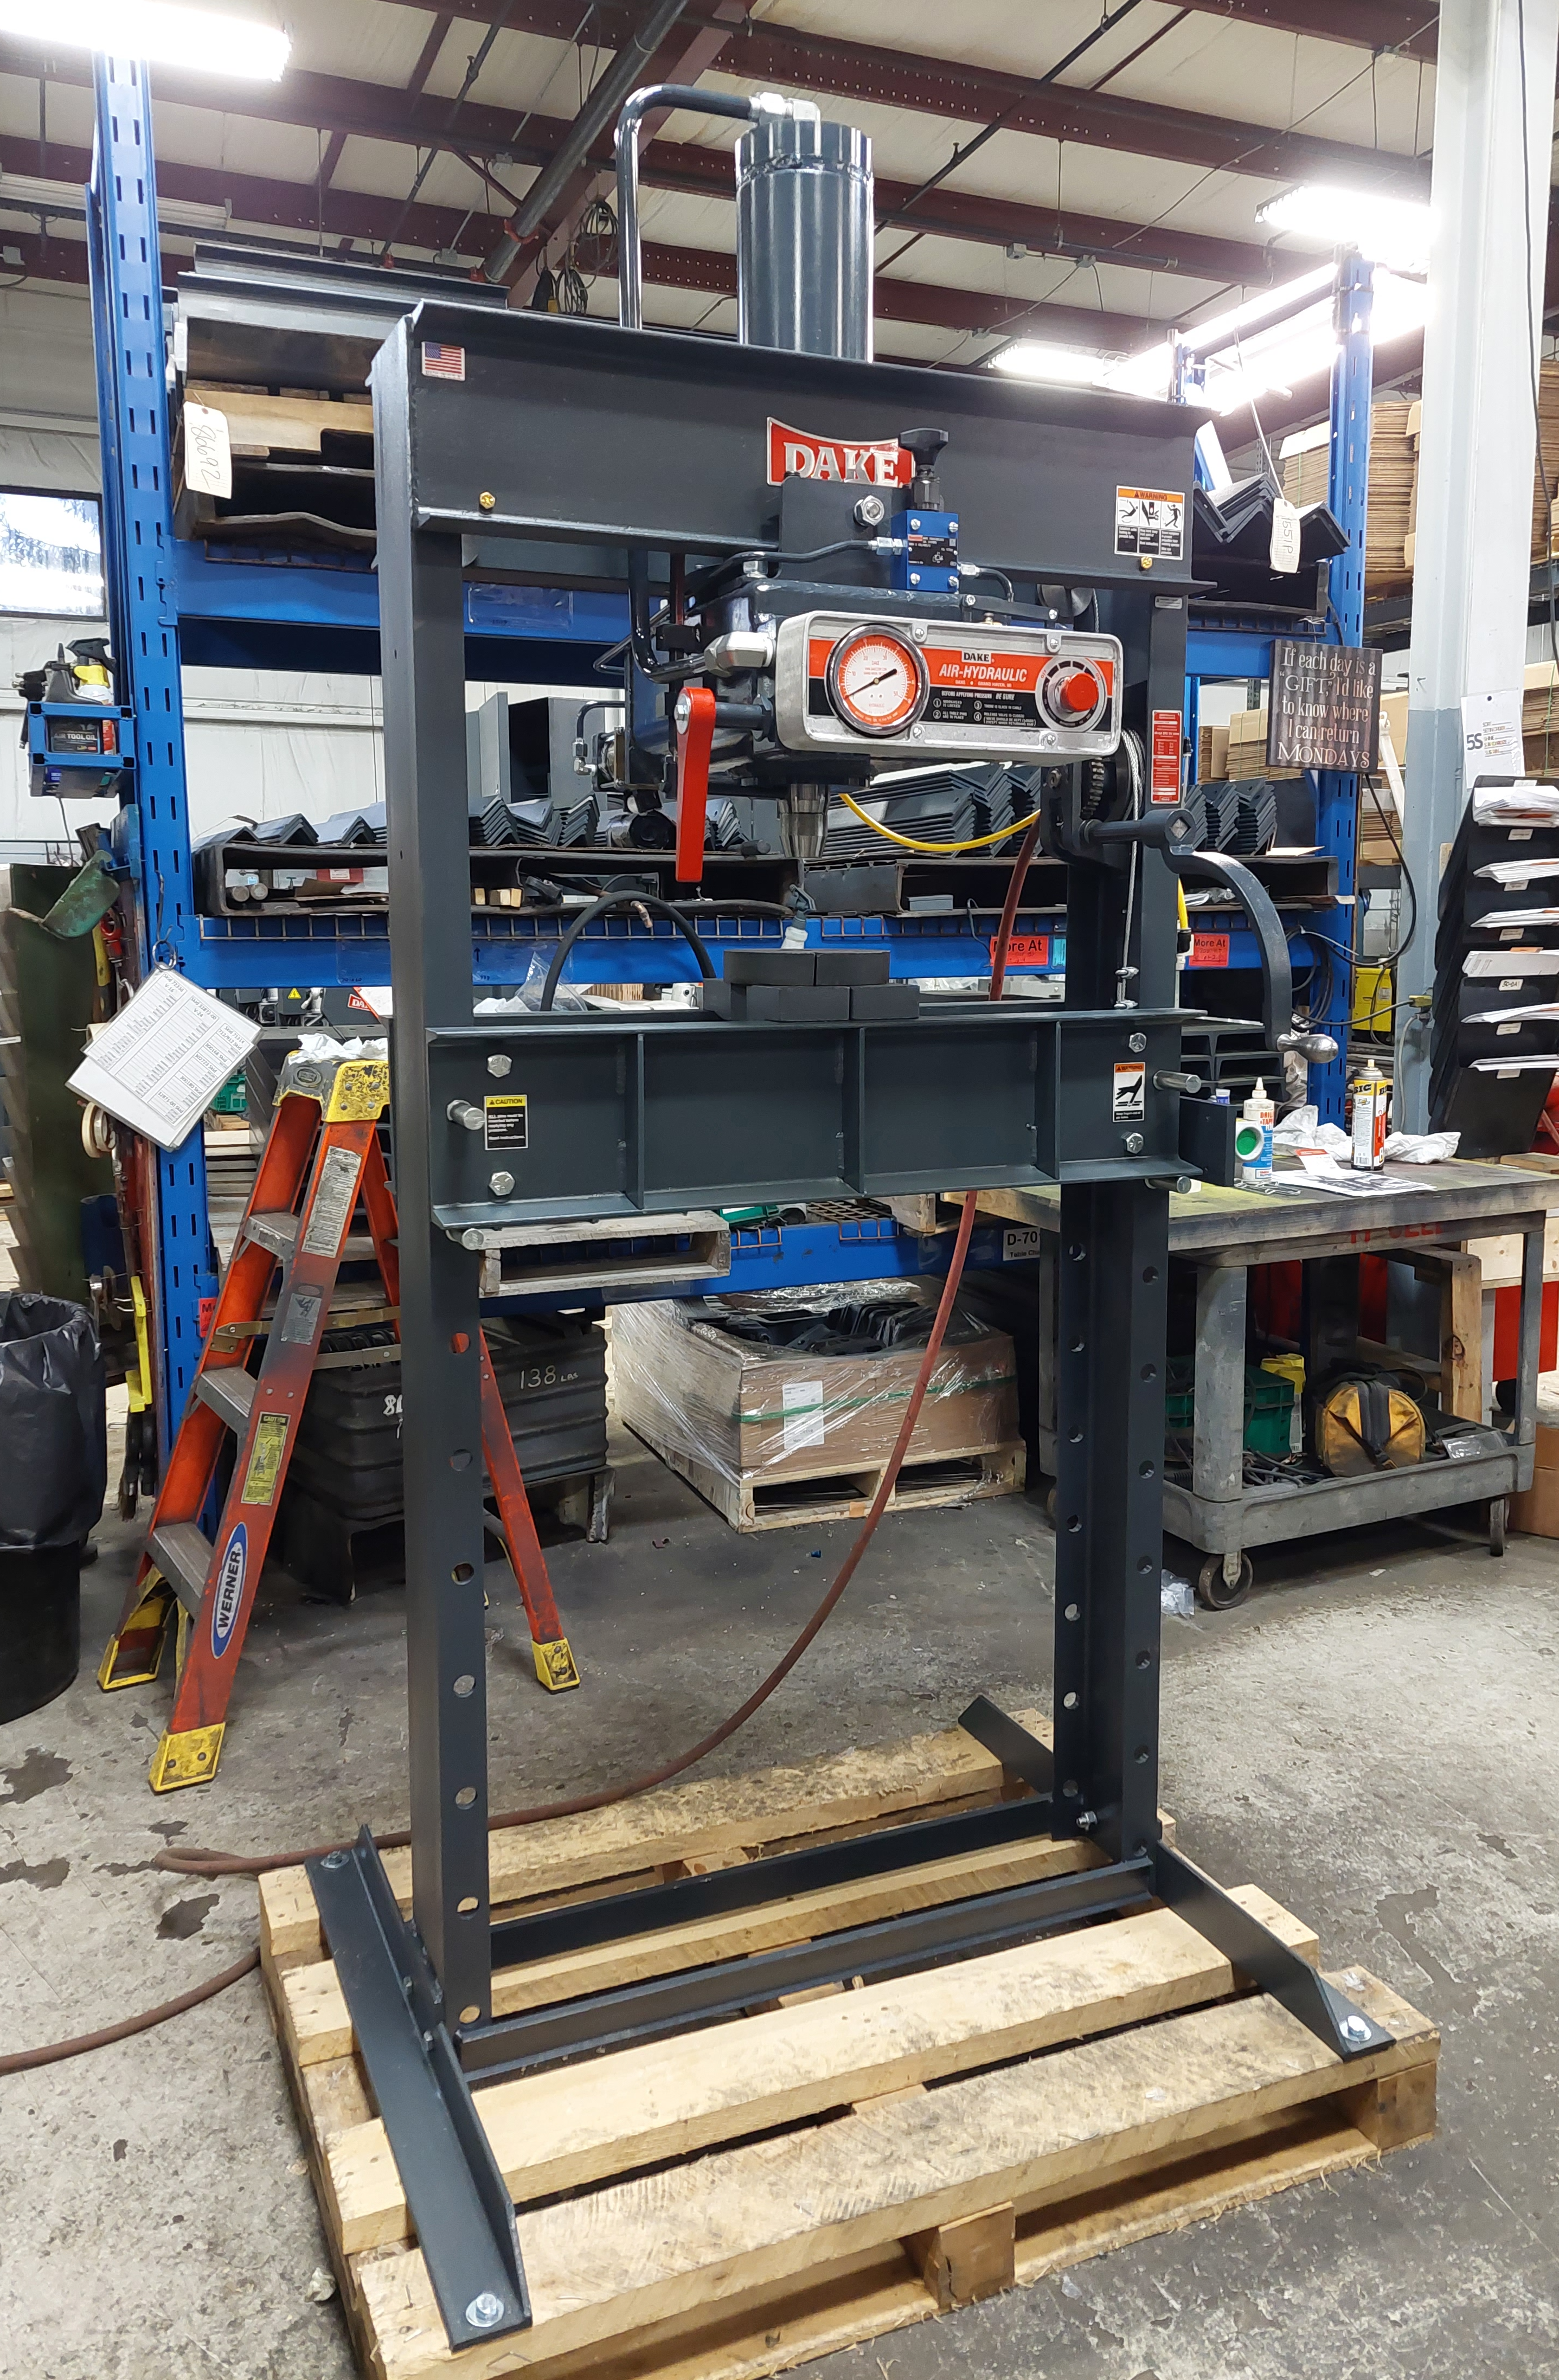
Here we are part five in the series “Dake presses, set up, trouble shooting and maintenance” Today we are in the mood for something that is powerful yet airy. How can you have both something that can produce tonnages up to 150 ton of brut force, yet operates off your shop air supply? That would be Dake’s single acting air H-frame presses. So, fire up your compressor, grab your tools and let’s get the beast installed, let the fun begin…
AIR PRESSES (All tonnages)
SETTING UP THE PRESS FOR OPERATION
For shipping convenience, some of the parts are not assembled. Assemble these parts in the following order:
- Bolt the base angles to uprights using four bolts and nuts, which are provided. Make sure base angles are against stops on uprights.
NOTE: The press should set on a level floor with the base angles touching the floor at all points. Use shims where necessary.
- Connect airline into street elbow at right hand side of control block.
NOTE: Avoid restrictions in air supply line to insure ample air-to-air motor. To ensure maximum performance the air supply line should be ½” pipeline if the distance from the compressor to press is 0-30 feet, ¾” line 30-60 feet, and 1” if greater than 60 feet.
NOTE: AIR MUST BE MOISTURE FREE. WATER IN AIR LINE WILL CORRODE THIS PRESS BEYOND REPAIR.
- Oil Requirements: Fill reservoir with Mobil DTE 24 or equivalent oil thru pipeline in back of press at pipe coupling by removing pipe plug. NOTE: Make sure the air-source is removed from the reservoir prior to removal of plug. Oil level may be checked (with ram up) by removing the pipe plug on the right side of reservoir near the front. Replace plug before operating the press.
Model 6-225 & 6-425 25-ton presses use 6 quarts
Model 6-250 & 6-450 50-ton presses use 8 quarts
Model 6-275 & 6-475 75-ton presses use 10 quarts
Model 6-650 & 6-850 150-ton presses use 20 quarts.
- Attach nose piece to ram by inserting shank into ram and tightening the set screw.
CAUTION! Place the hoist crank on the lift drum shaft. Turn the hoist crank to relieve the pressure on the table pins. Keeping tension on the hoist crank, remove the table pins one at a time. After removing the tables pins, turn the crank running the table channels from top to bottom. Check to make sure the cable is tracking correctly. The cable should be on each of the two upper pulleys and should track back and forth on the cable drum. Always place table pins under the table channels before releasing the hoist crank when positioning the table channels for cable tracking, servicing, or set-up for desired work opening. If a tracking problem exists, contact the Dake factory for instructions. Be sure all table pins are fully inserted in place before applying pressure. Always remove or release pressure on the cable before pressure is applied.
WARNING: DO NOT OVERSTROKE THE RAM. Over stroking will cause premature seal failure. Models 6-225, 6-425, 6-250, 6-275 and 6-475 have a 10-inch stroke. Models 6-650 and 6-850 have a 16-inch stroke.
TROUBLE SHOOTING
If press will not develop rated tonnage.
- Dirt under valve balls. Refer to owner’s manual
- Worn cup leather. Refer to owner’s manual
- Relief valve not set properly. This valve is located on the top side near the right end of the control block at the front of the reservoir. The valve is set at the factory to bypass oil from the pump back to the reservoir when the press reaches its rated capacity. The load on the spring (Item 91), which governs the pressure at which the valve will bypass oil, is adjusted by turning the screw (Item 90) in to increase pressure or out to decrease pressure. Replace seal (Item 89) and cap nut (Item 88).
NOTE: We advise that the relief valve not be tampered with after it is once set at the capacity of the press. - If nothing happens when press is operated.
-
-
- Release valve open. Be sure to have release valve firmly closed when using press.
- If the ram will come down only a fraction of its rated stroke, check the oil level in the reservoir with the ram at the top of its stroke. It should be visible in the sight window at the side of the reservoir.
-
-
- If press is operating slow.
- Check air supply line for restrictions to determine if air motors are getting ample supply of air.
- Release valve not closed properly. Release valve must be firmly closed when using the press.
- Wrong hydraulic fluid. After considerable research and tests made with the cooperation of the pump manufacturer, we recommend Mobil DTE 24 oil or equivalent.
- If Oil is coming out of the air vent.
- Drain out the spring chamber by removing the 1/8” pipe plug, which is put in the hub or boss that contains the oil seal where the ram extends out of the reservoir. Once oil is drained, run the press up to full tonnage with pipe plug still out. Excessive oil is a sign that the head seal has been damaged. Refer to owner’s manual to replace seal. Replace pipe plug.
- Drain out the spring chamber by removing the 1/8” pipe plug, which is put in the hub or boss that contains the oil seal where the ram extends out of the reservoir. Once oil is drained, run the press up to full tonnage with pipe plug still out. Excessive oil is a sign that the head seal has been damaged. Refer to owner’s manual to replace seal. Replace pipe plug.
- Excessive leakage around the ram.
- Drain out the spring chamber as instructed in owner’s manual. A small amount of oil in this chamber facilitates lubricating the bushing the ram passes thru and prevents scoring. However, if operation performed on press is spoiled due to slight leakage of oil, remove pipe plug as described in owner’s manual and connect tube line to continually drain this chamber.
Well, there you have it for the air model H-frame presses. Next time we talk will be the last segment in the series which will cover the “Dura Press” These models are crammed with features and cool things that set us apart from anybody else.
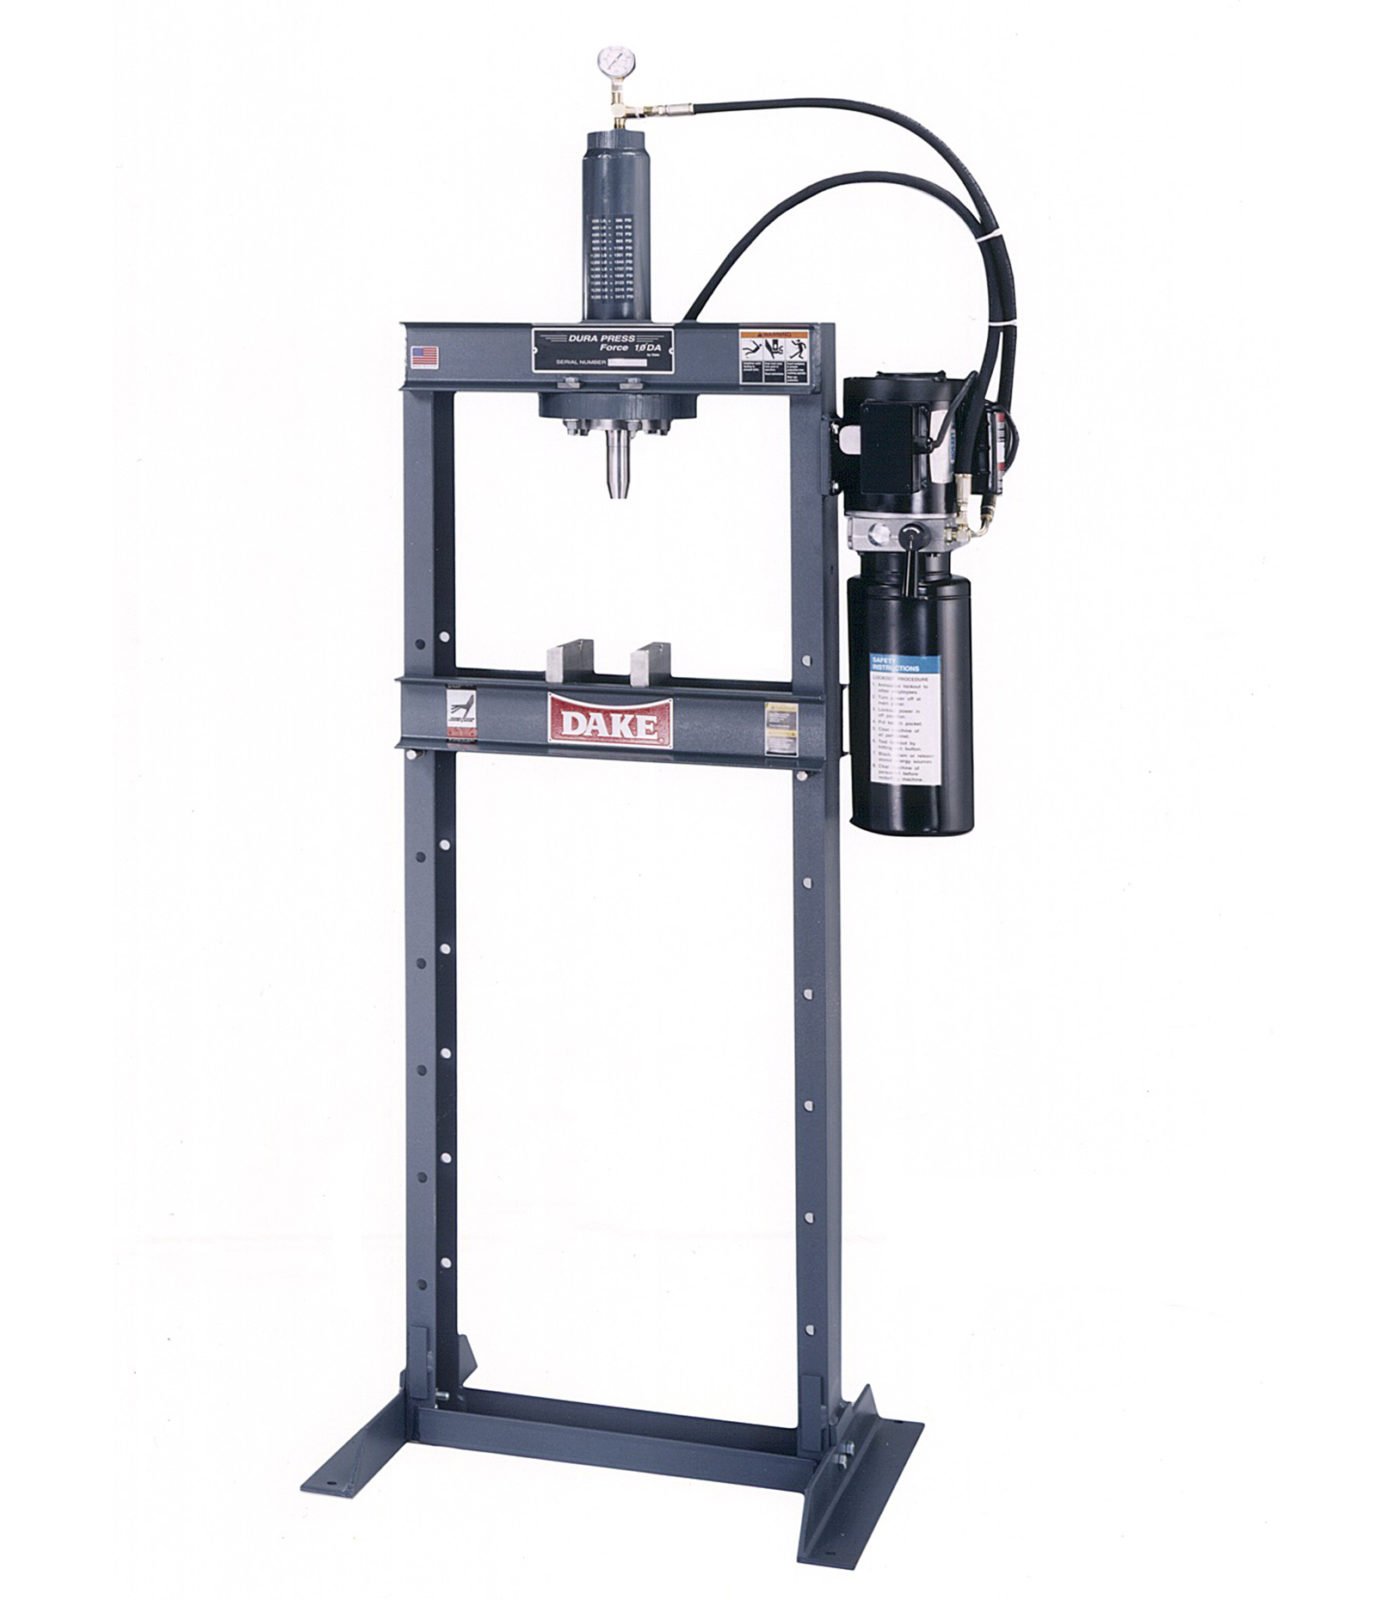
For a sneak peek visit our Single Phase Dura-Press Force 50DA!
.jpg)